If you're reading this, you're planning on roasting a turkey.
And if you've roasted a chicken before, you can DEFINITELY roast a turkey. After all, turkeys are just adult chickens**.
**Not true, but you get the idea.
Before you begin, here are some TURKEY TIPS to ensure that you roast the best bird possible.
1. DEFROST DEFROST DEFROST
Most turkeys are previously frozen. To be sure that it's completely thawed before you cook it, buy your turkey one or two days before Thanksgiving and let it thaw in the fridge.
2. SIZE MATTERS
Depending on how many people you are feeding (aim for about 1 to 1 1/2 pounds of turkey per person), try to find a bird in the 12- to 18-pound range, because, well, smaller birds taste better. They cook more evenly and since the breasts are smaller, they've got a fighting chance of actually still being juicy by the time the rest of the turkey is cooked.
3. SALT IS YOUR FRIEND
If you're simply seasoning (instead of brining or dry brining), you'll want to use the "teaspoon per pound" rule. That's one teaspoon of kosher salt per pound of meat. This may seem like a lot of salt when you're working with, say, a 12-pound bird (that's 12 teaspoons which is 4 tablespoons, which is 1/4 cup), but trust me, you need it. The bird needs it.
4. TIMING IS EVERYTHING
Plan on roasting for about 15 minutes per pound. For a 12-pound bird, this is about three hours. Plan on resting it for at least 30 minutes, up to an hour. Plan accordingly!
5. NO STUFFING ALLOWED
Please don't put stuffing inside your turkey. It slows the cooking process, and because it's in contact with the raw turkey, you run the risk of eating raw-turkey infused stuffing. No thanks. Besides, how you gonna get all those GOLDEN BROWN DELICIOUS bits if it's roasting inside the bird?
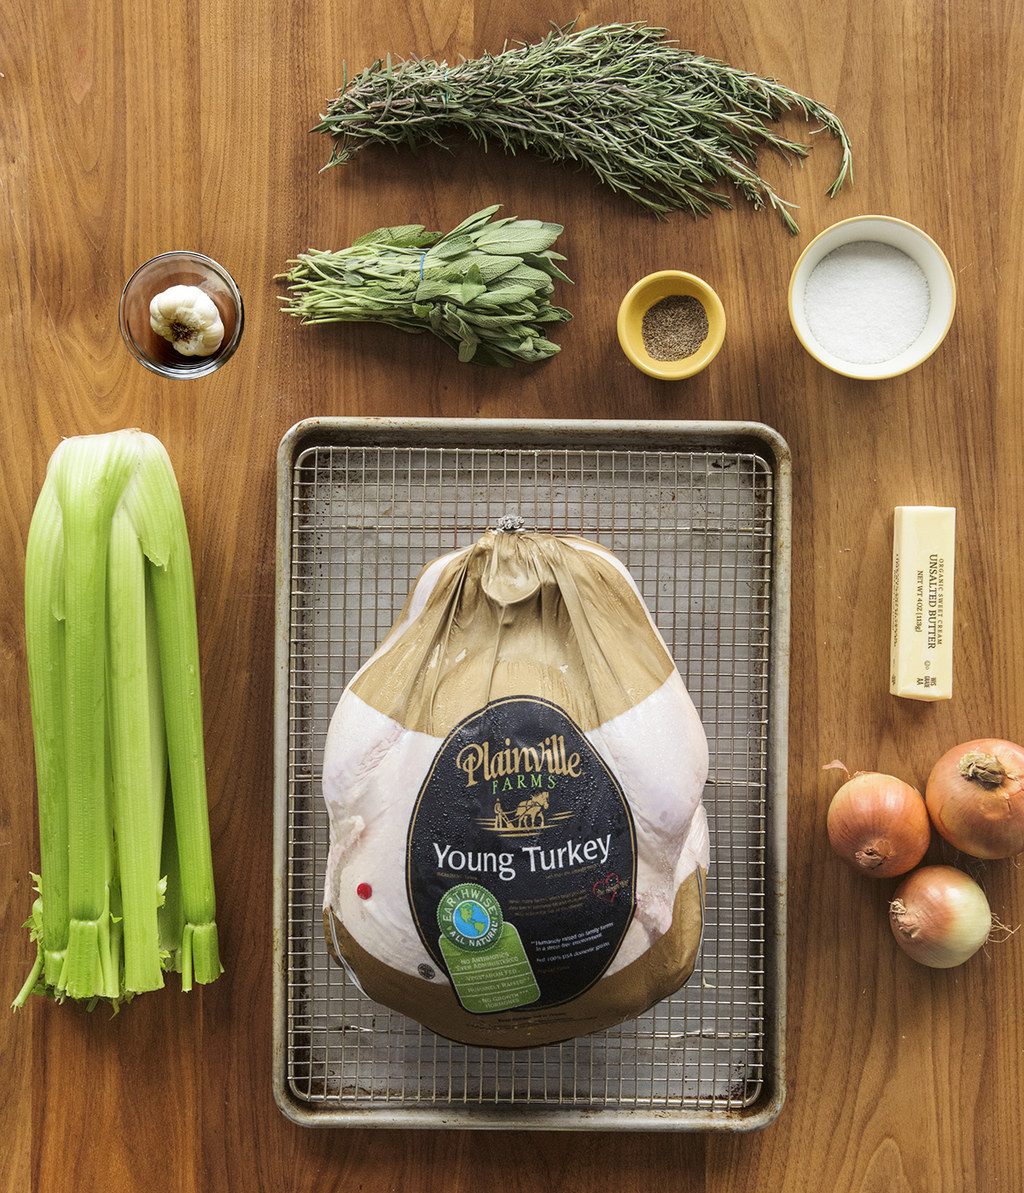
OK, now that you're educated, let's get started on roasting this lil' bird. Here's what you'll need:
1. First, we are going to make an herb butter to slather upon said bird.
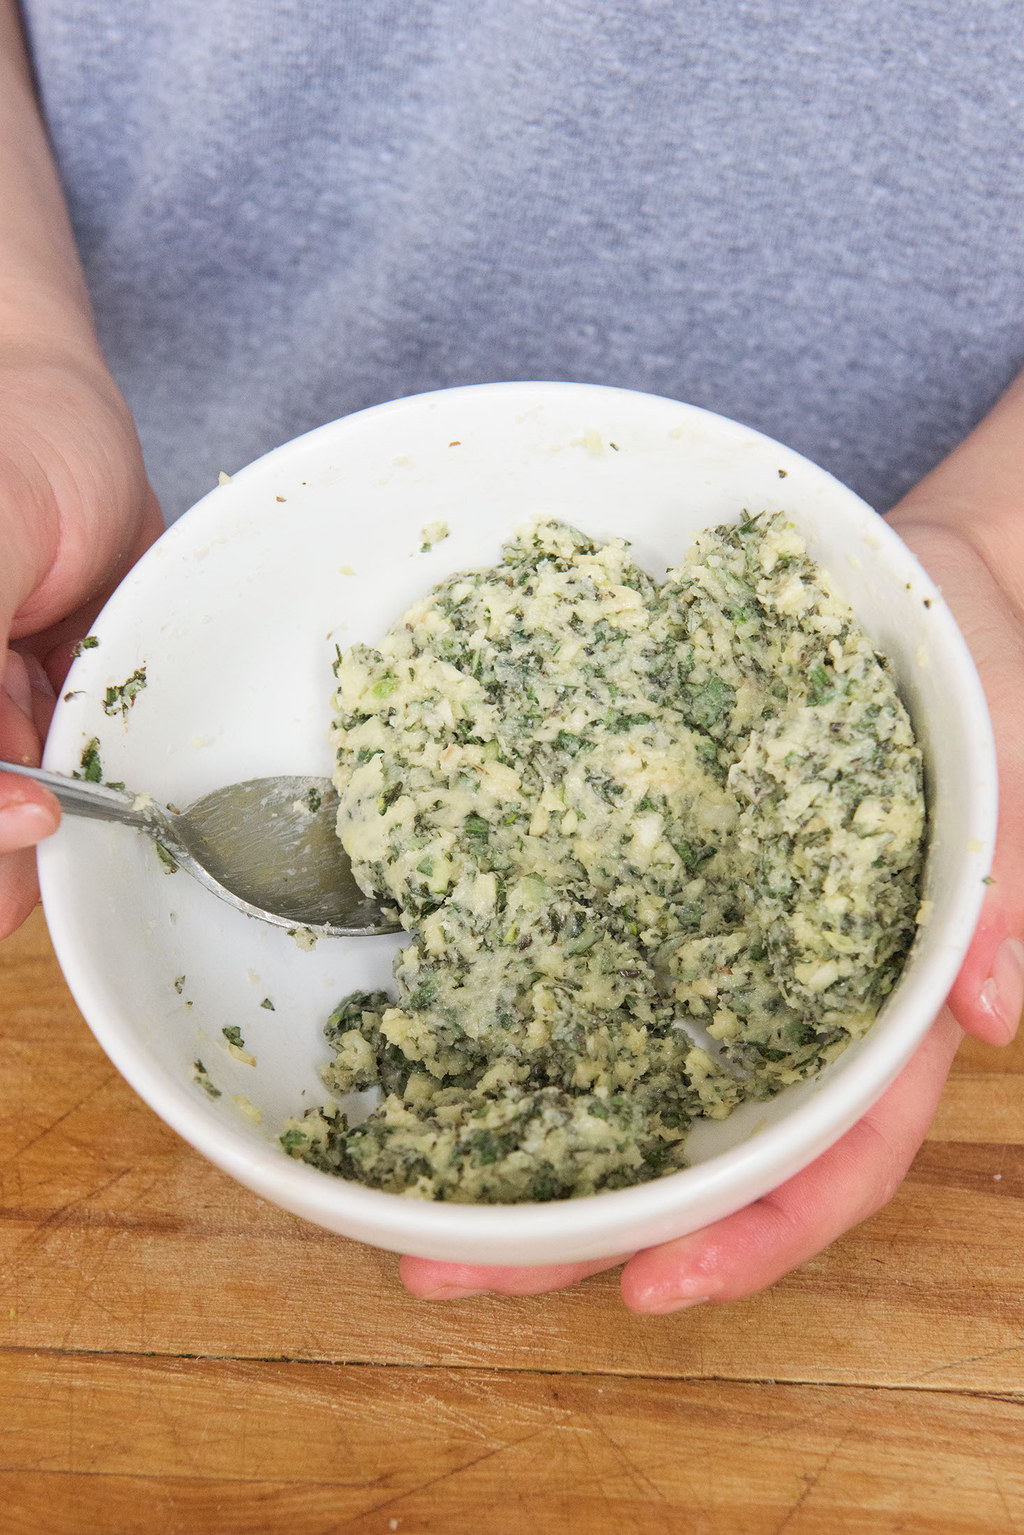
Why make a seasoned butter instead of just sprinkling some salt and pepper?
Well, turkey has a bad rep for being dry and flavorless. This is because turkey is a very lean meat, and most people under-season it. This herb-butter is going to solve all of those problems by giving you a measured amount of salt for seasoning, butter for added fat, and herbs and garlic for incredible flavor.
2. Do this by mashing the salt, pepper, chopped herbs, garlic and butter together in a bowl. Make sure your butter is soft enough to mash. Feel free to microwave it for a few seconds if it's still a little firm.


OK, so I know that your eyes are basically bulging out of your eyes when you read 1/4 cup of kosher salt, but this is based on the "teaspoon per pound" rule. And by my calculations, that's a 1/4 cup of kosher salt. I don't write the rules — I just enforce them.
3. Before you do anything with that turkey, remove anything inside of it. Almost every turkey has a plastic thingy and a bag full of stuff in its cavity. REMOVE BOTH OF THOSE THINGS.
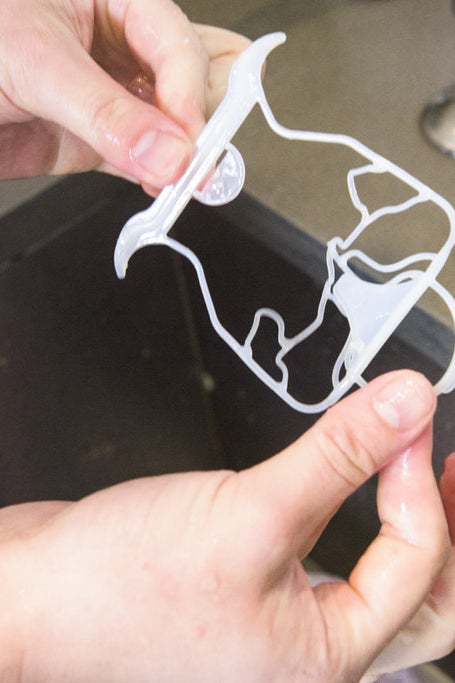

That bag of stuff is actually the organs. Fun things like the liver, kidneys, neck, and heart. YUM DELISH.
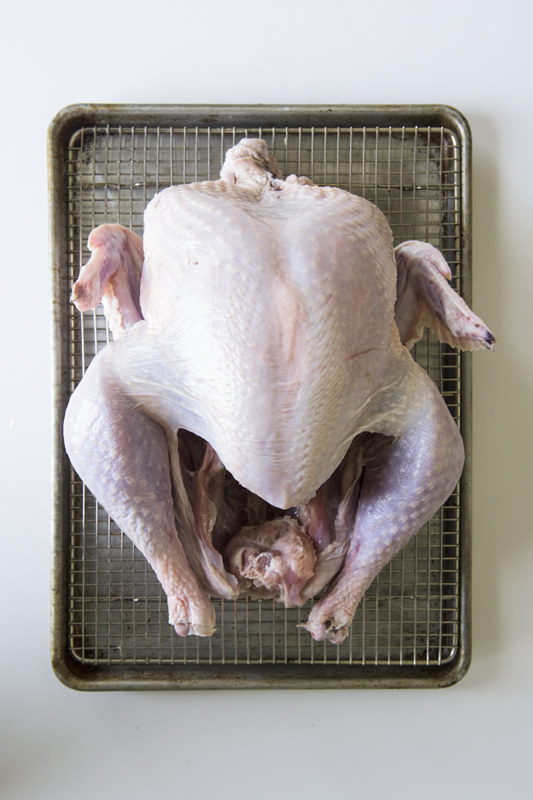
4. Here she is! Glorious, right?
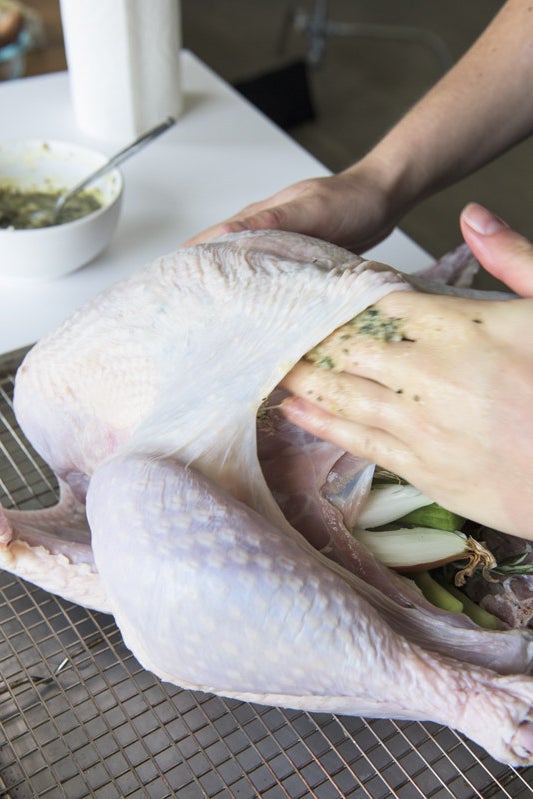
5. Now that those things are outta there, you can fill it back up with COOL STUFF like celery, onions, and herbs.
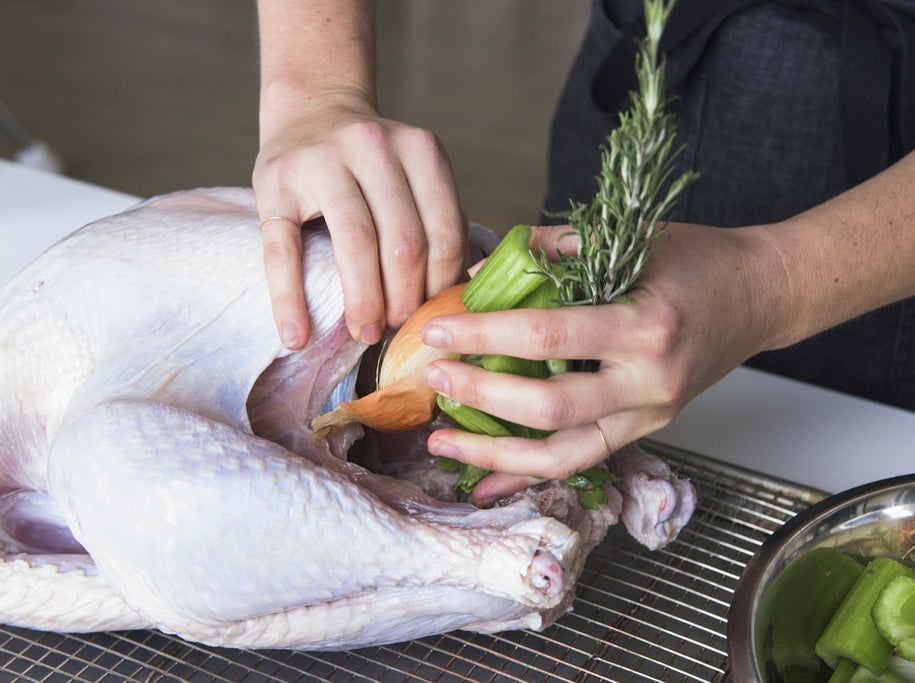

These are called "aromatics." They are intended to provide flavor, not to be eaten, so go ahead and leave the onion skins on, the celery in large chunks, and don't even worry about removing the leaves from the herb stems.
You might notice that this bird is not tied with twine (aka trussed), and that is because I don't believe it is necessary.
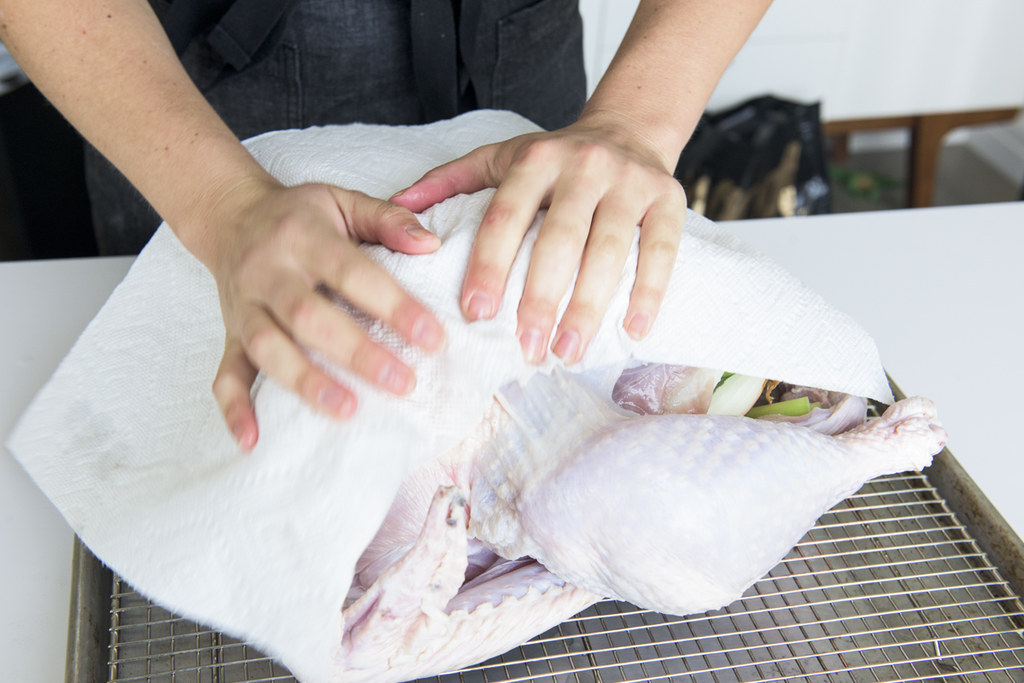
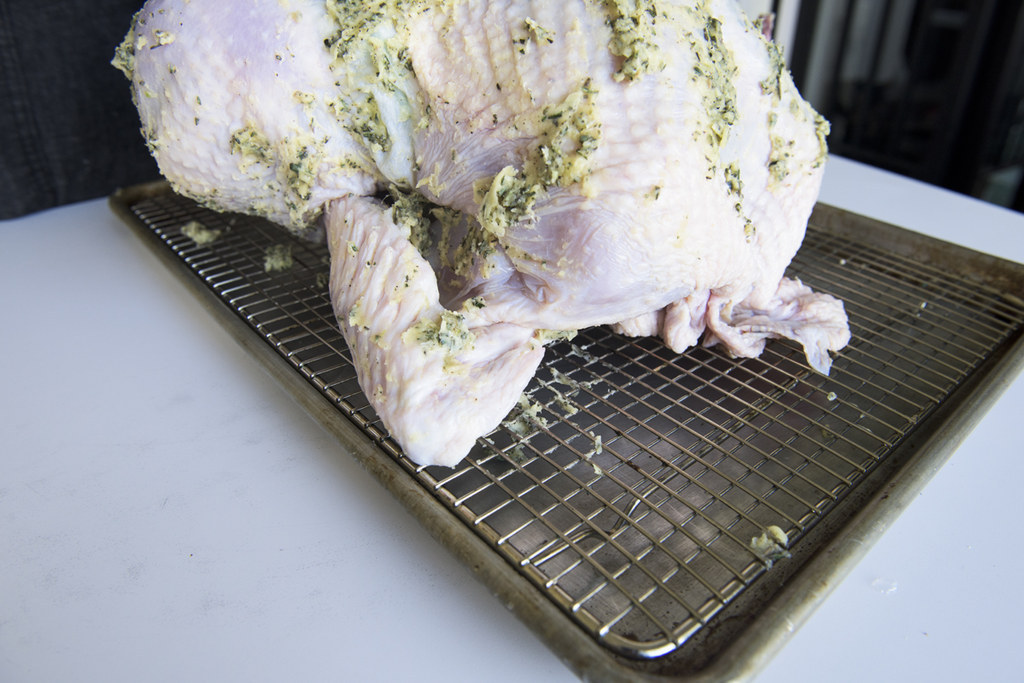
6. Before you rub the turkey down with butter, pat it dry.
7. Here's where things get weird, and I promise this will be the hardest thing you'll have to do this whole time. But it will be worth it. You're going to pull the skin away from the breast meat.
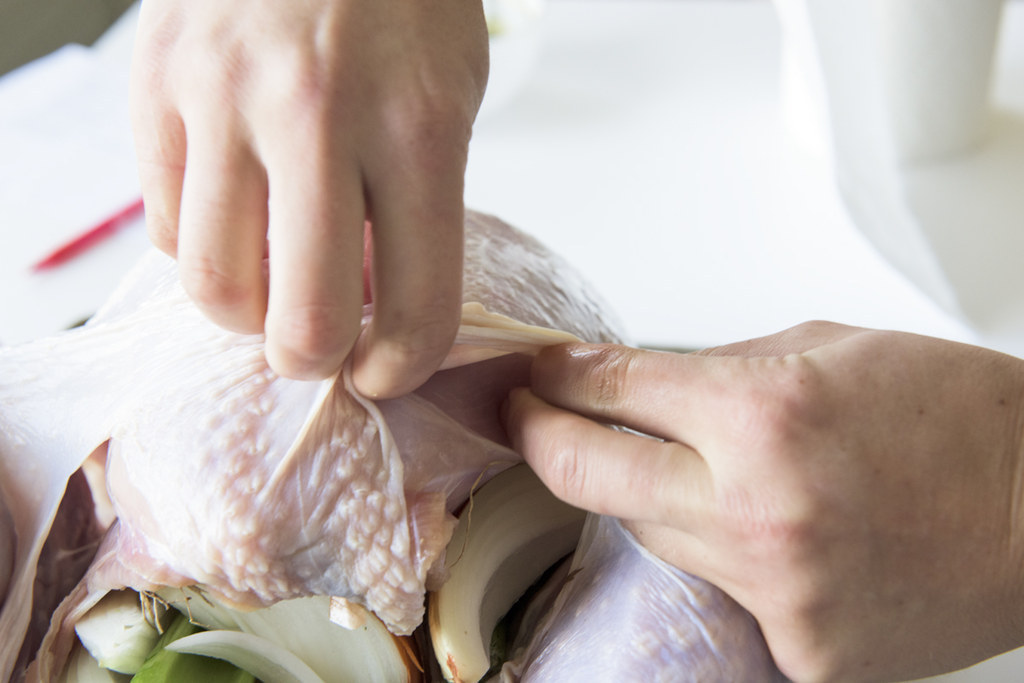
8. Start at the butt end (where the cavity is) and literally just slip your hand in there. Turkey skin is very stretchy and will not tear, don't worry. Just go slow, relax, take a breath, have a sip of wine, and get in there.


Get as close to the neck as possible, but don't worry about getting all the way up there.
9. This is all so you can get some of that herb butter directly onto the meat, under the skin.
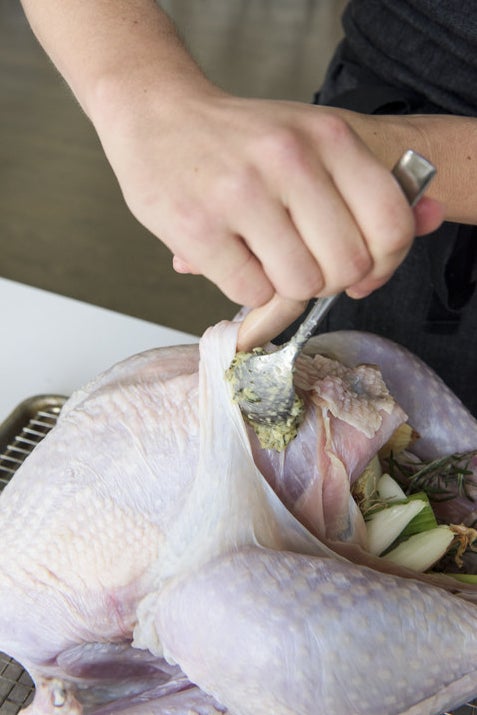
Just rub a few spoonfuls inside.
10. Then slather the remaining butter all over that bird and in all those nooks and crannies. Don't be shy!
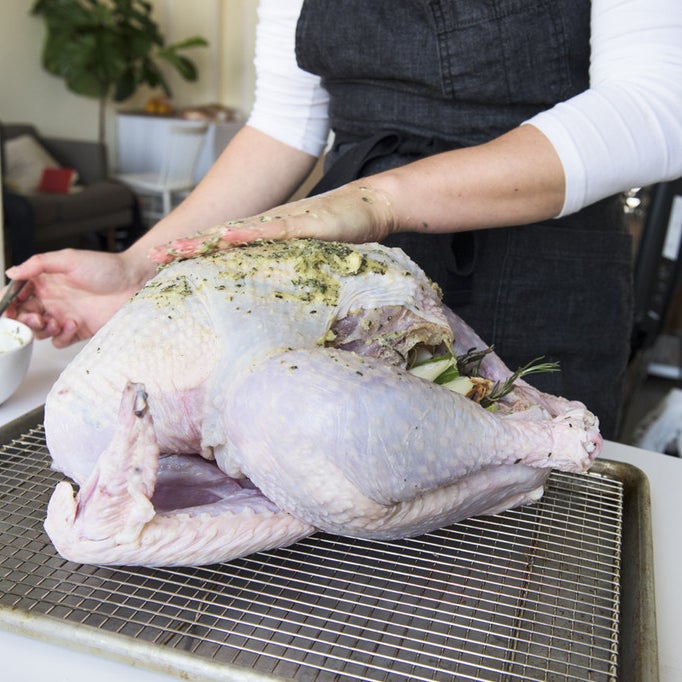

This turkey is kinda looking like it's about to drop the hottest album of 2015.
11. Next, tuck the wingtips under the breast (so they don't burn).


12. Like this:
13. Put the turkey in a 425° oven and pour 3 cups of water in the bottom of the pan.

The water does a few things:
1. It prevents the bits on the pan from burning
2. It creates abundant pan drippings, so you have something to make gravy with.
You want to have a little water covering the bottom of the pan at all times; if at any point you notice it's starting to evaporate, just add more.
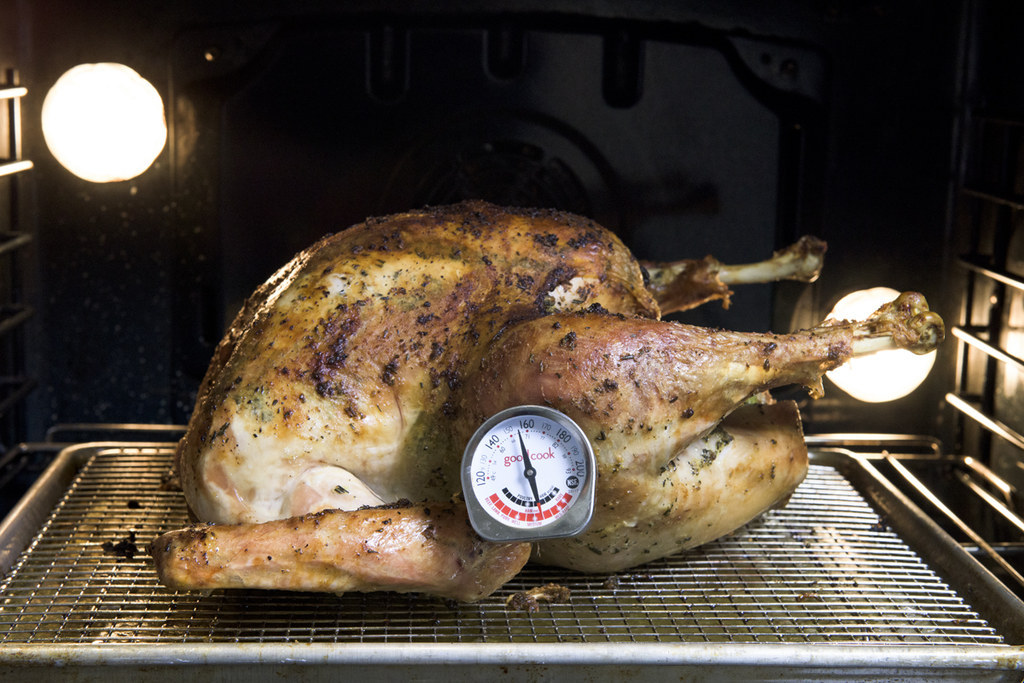
14. You are going to roast this bird for about 2 hours at this temperature, then you're going to lower the oven temperature to 375˚F and roast it for another 1 to 1 1/2 hours.

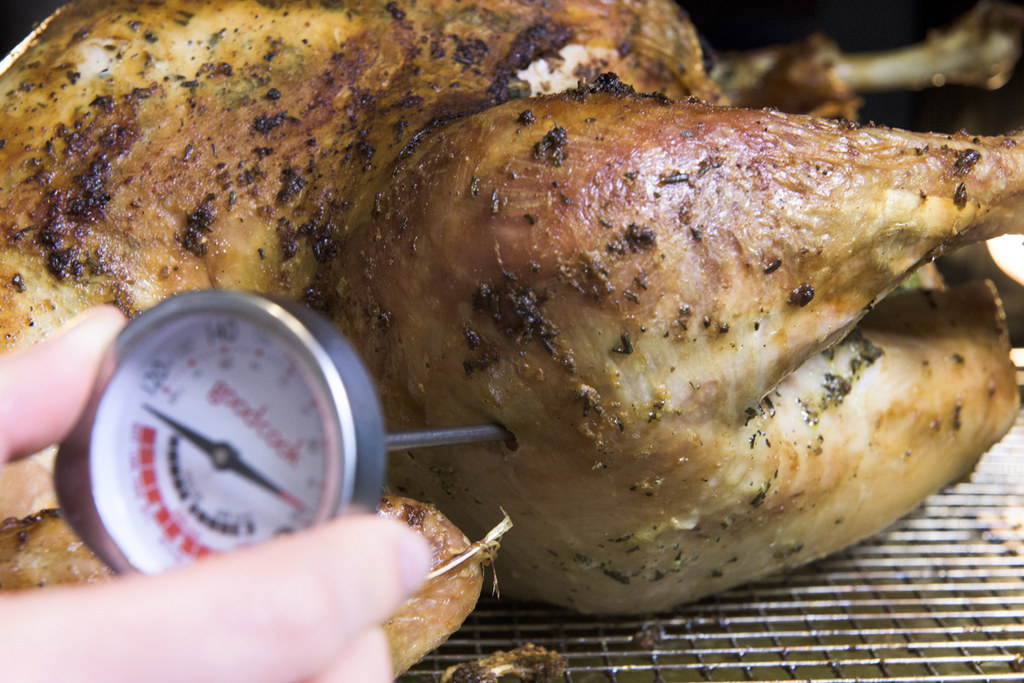
15. Around the 2½-hour mark, you should start checking the temperature of your turkey. Do this by inserting a thermometer into the thickest part of the thigh, right below the drumstick.
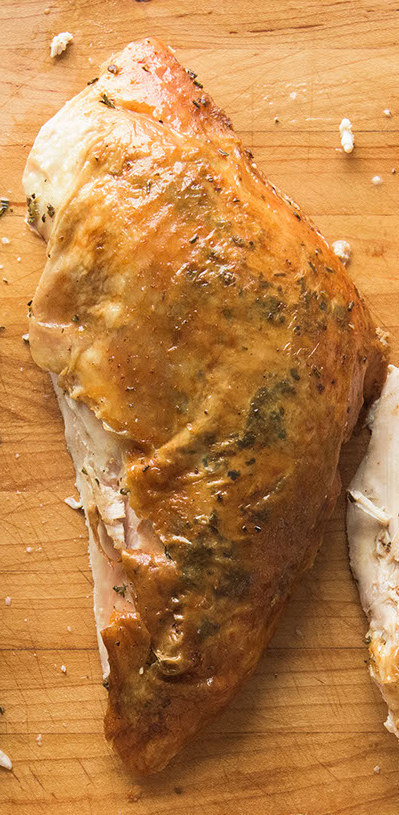
16. SUCCESS. Note how wonderfully golden brown the bird is. I die.
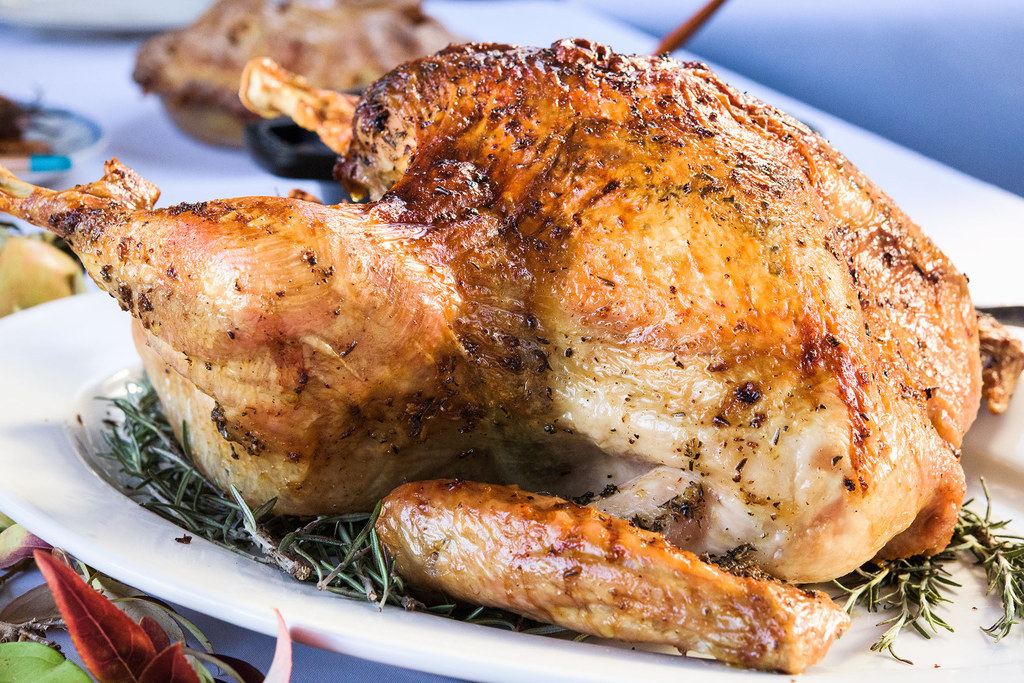
17. Remove this lil' lady from the oven and let it rest at least 30 minutes. This lets all the juices redistribute evenly.
18. For a real Barefoot Contessa moment, transfer it to a serving platter with some herbs to present to your guests before carving.
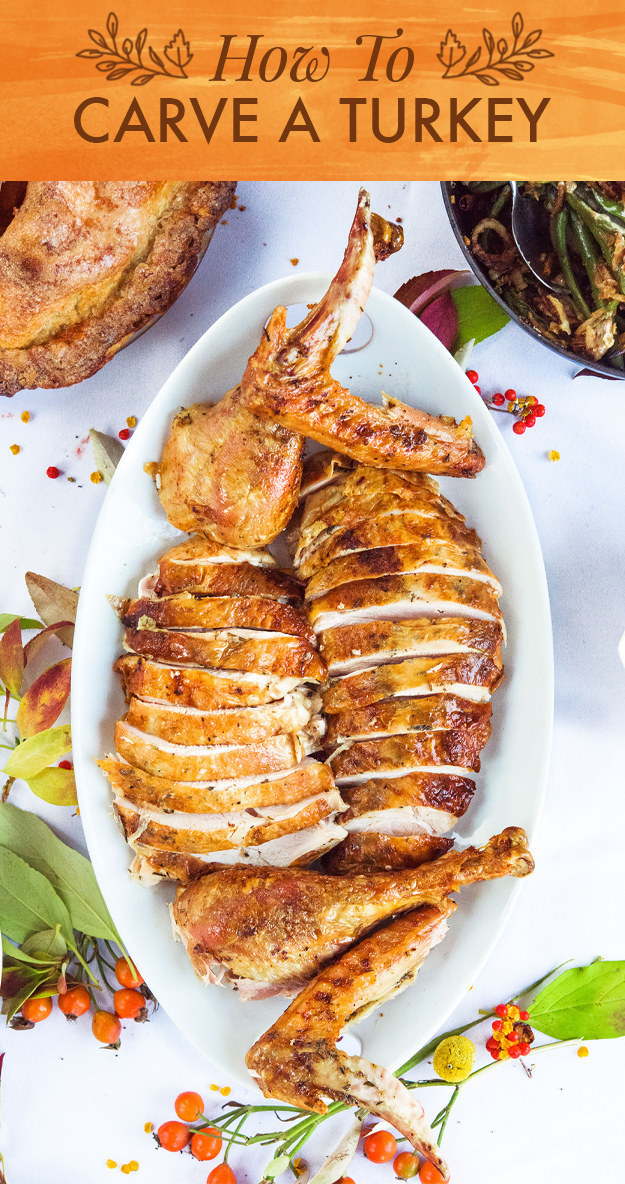
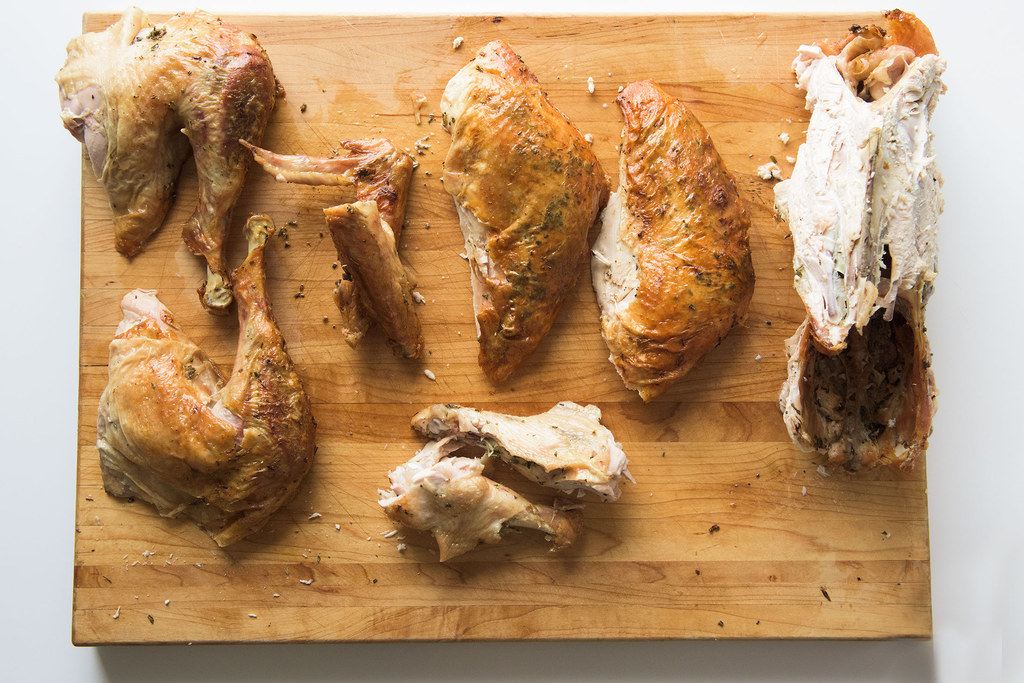
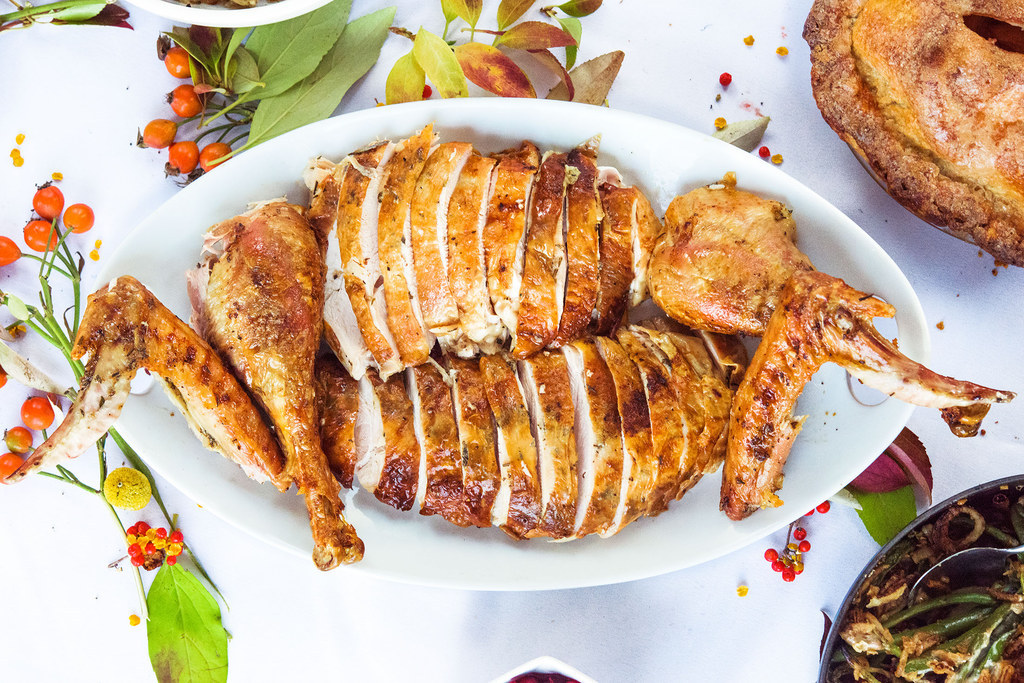
19. Like roasting a turkey, this is just like carving a (really big) chicken. Here are the pieces you are going to end up with.
20. Start by separating the leg from the body: Take your knife and slice the skin where the leg is attached. Once you do that, the leg will kinda splay open and it will become very obvious where you need to slice.

21. When you feel your knife hit the joint of the leg — do this slowly — carve around it, not through it.
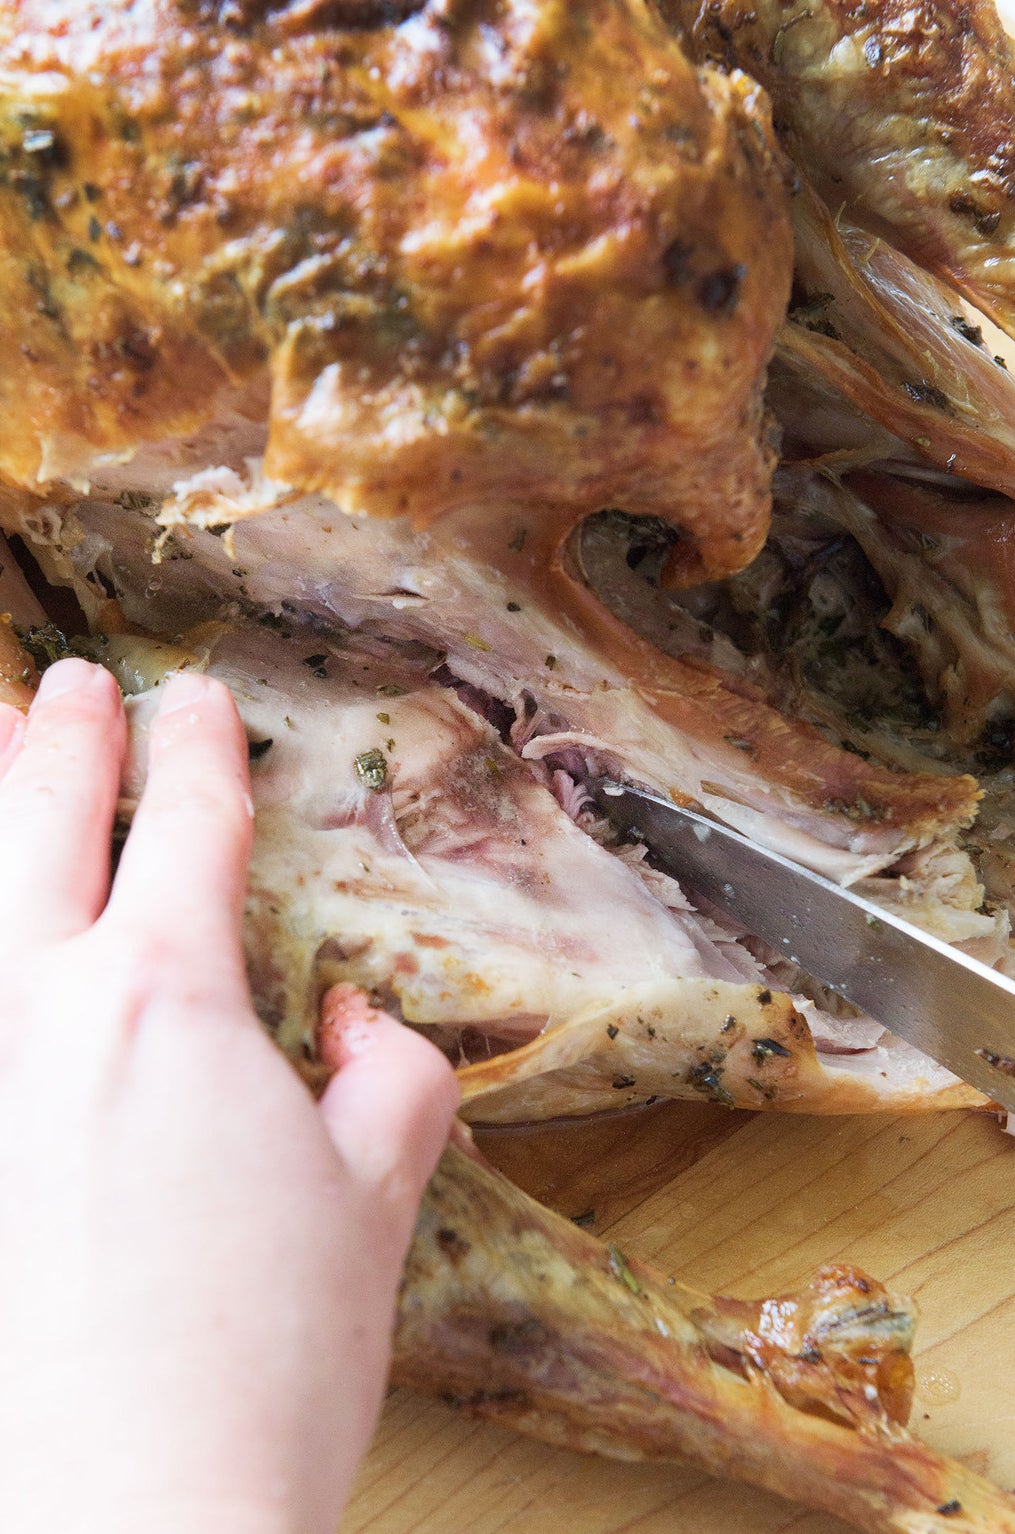
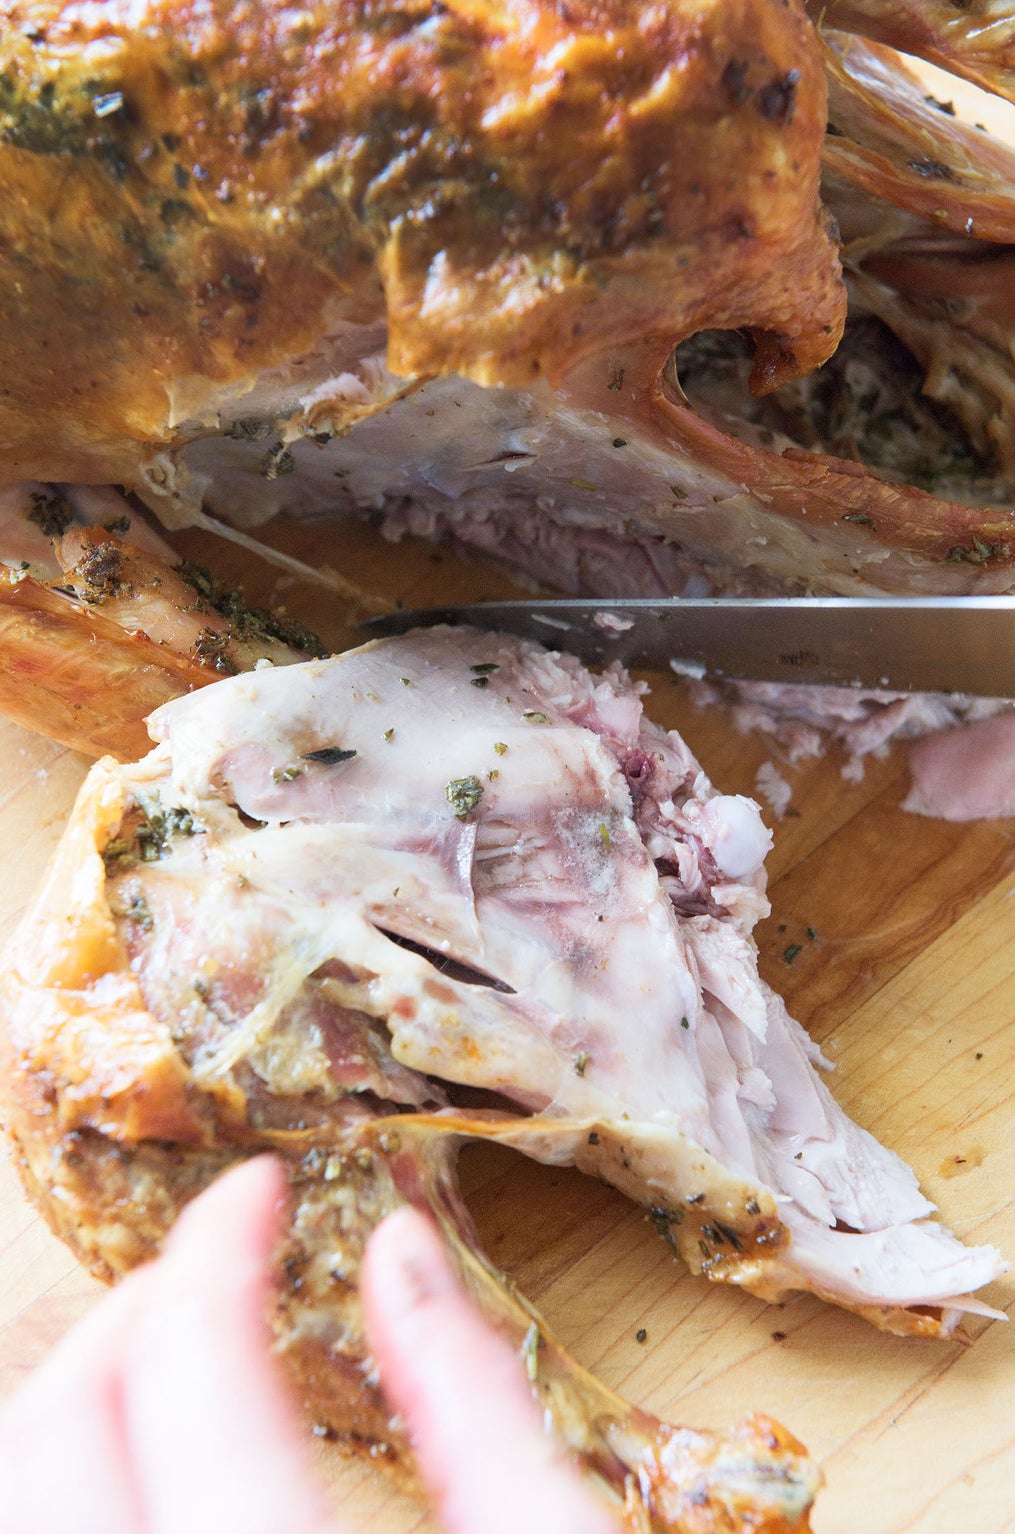
Once you do this, you will see the joint pop out...see? Since cartilage is softer than bone, this won't be super hard to slice through, but you will need to apply a bit more pressure here to make sure you cut through it completely.
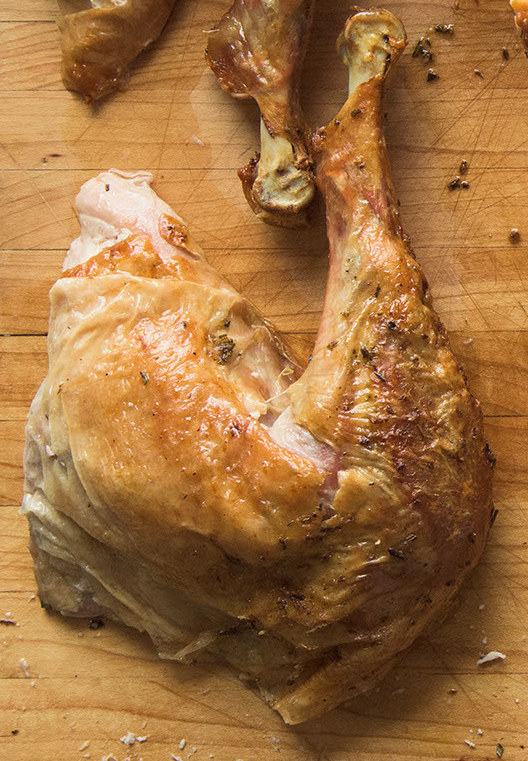
22. A thigh! A leg!
23. So you know when you get buffalo wings there are wingettes and drumettes? That's actually just one wing. So we are going to make turkey wingettes and drumettes by separating the wing into two pieces.
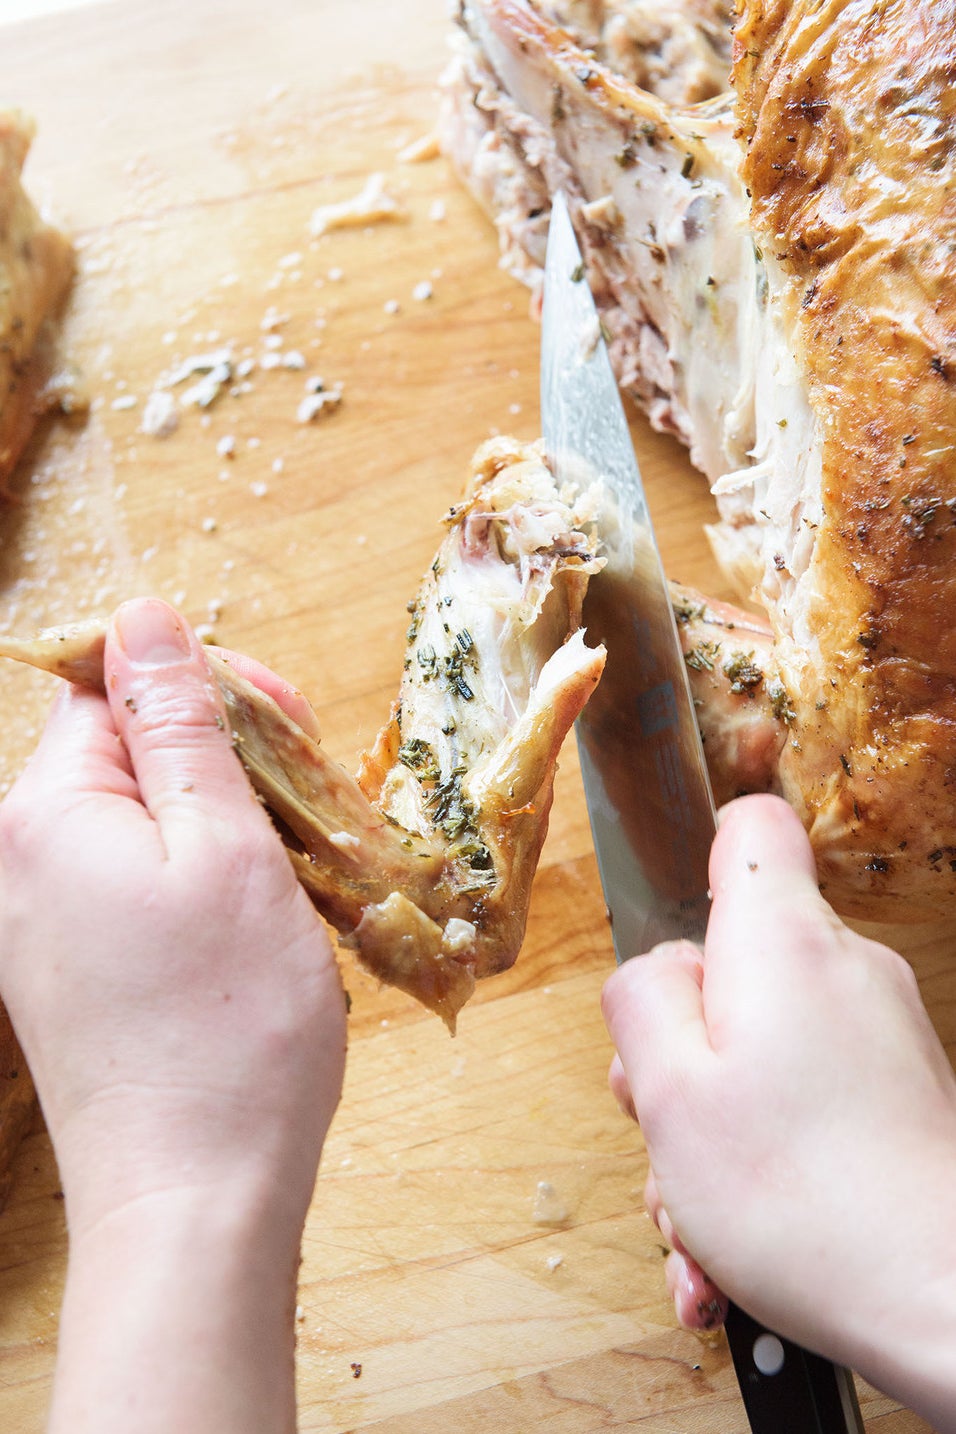

Starting at the second joint, just cut through the wing to free the "wingette" part from the rest of the wing, leaving the "drumette" attached to the carcass (we will carve that away later).
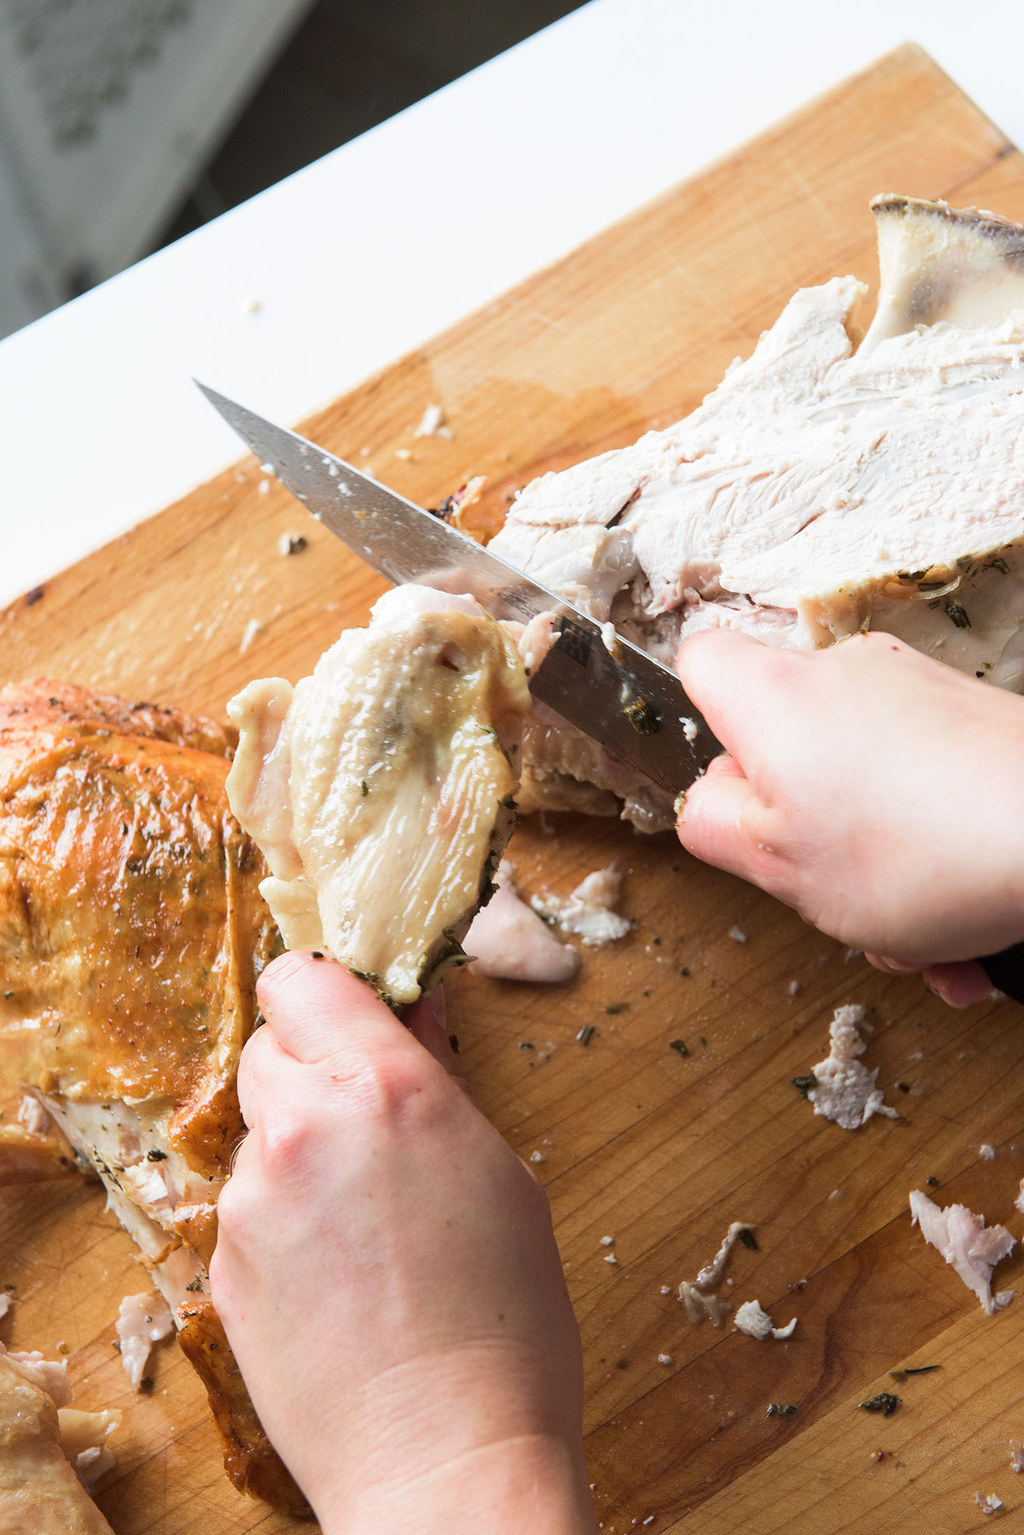
24. Now for the breast. Feel for the breast bone in the middle (the bone that separates the two breasts) and pick a side to start on. You want your knife to carve as close to this bone as possible, so you don't waste any meat.
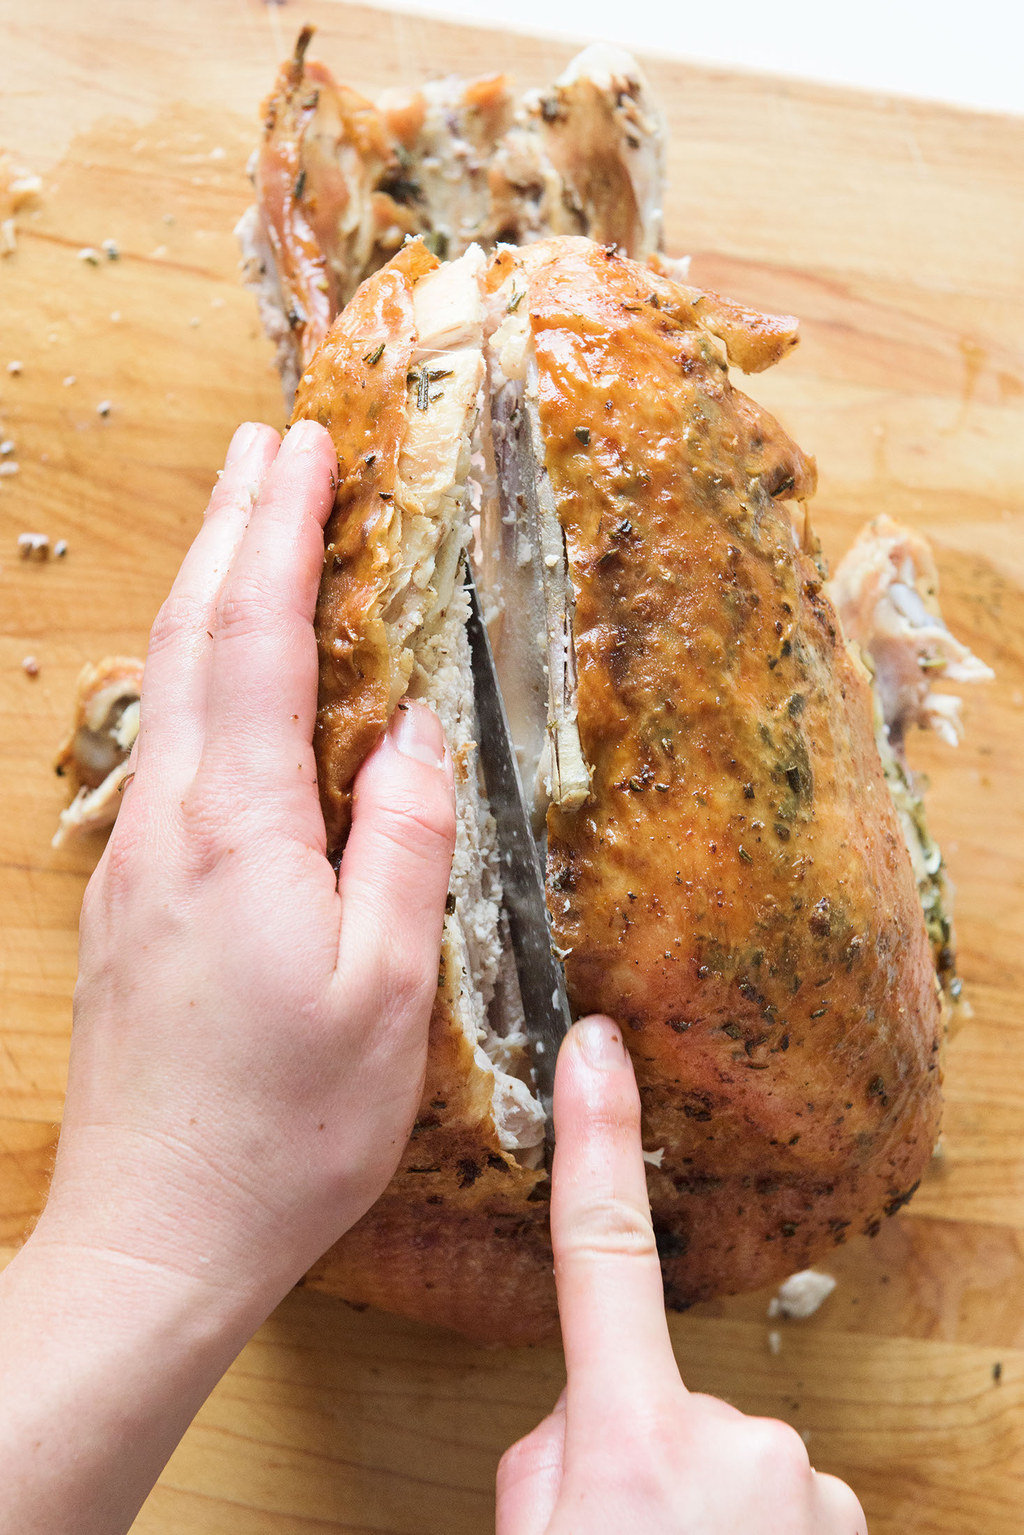
25. As you slice down, the breast will start to naturally fall away.


Slice it off right as you get to that "drumette."
26. A breast!
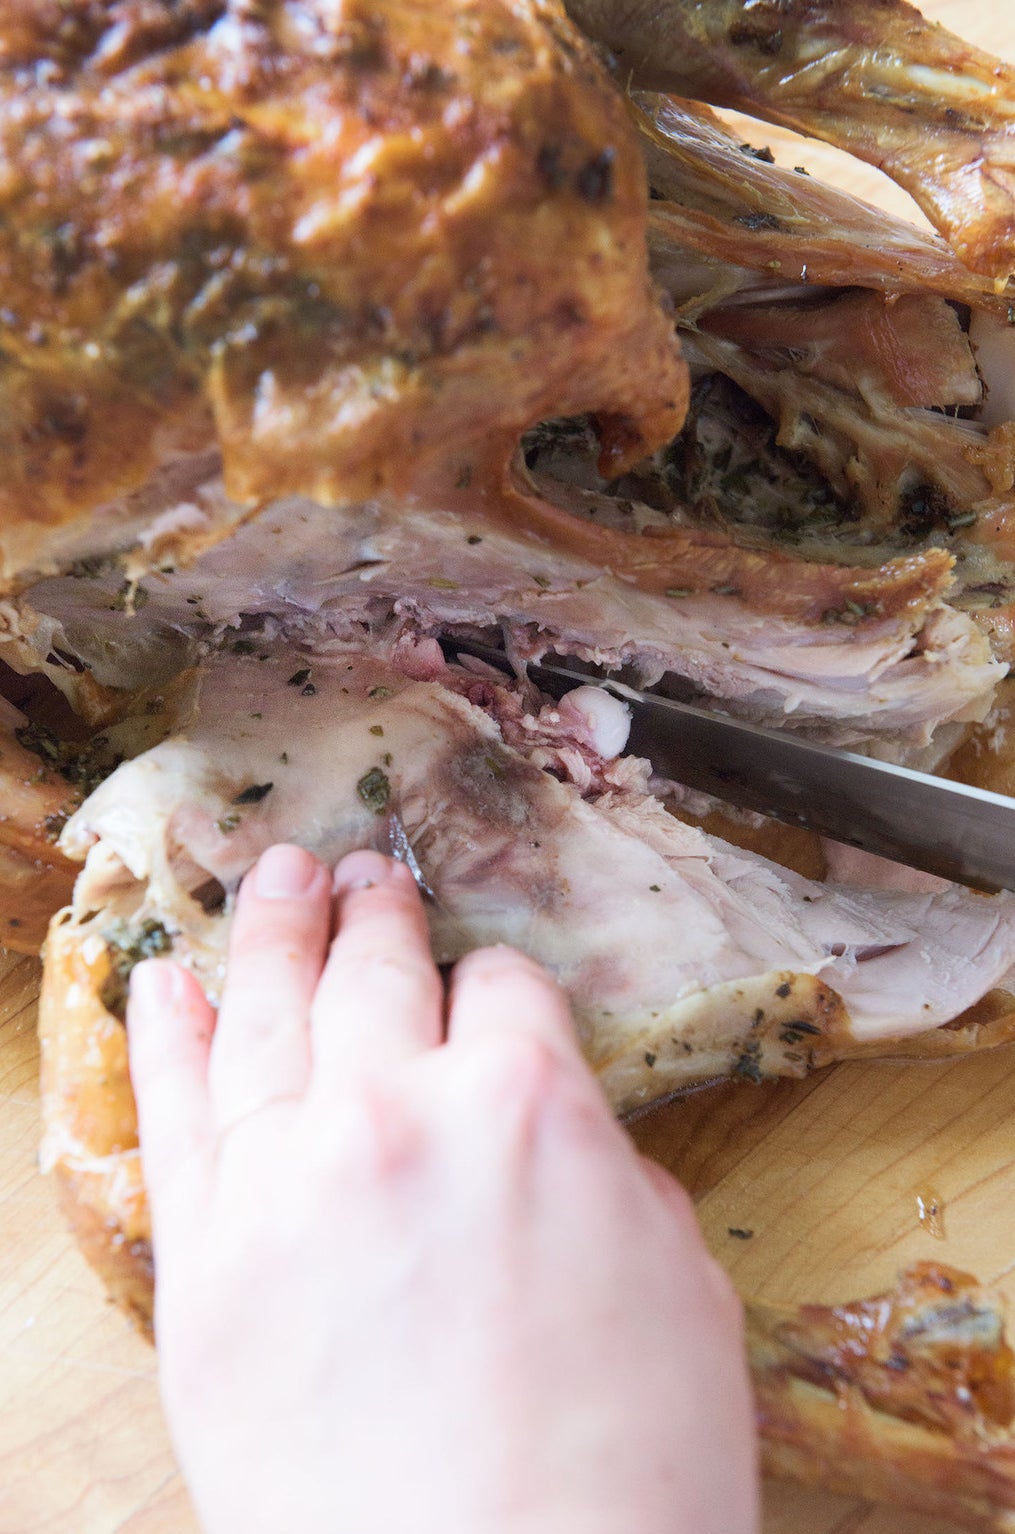
27. Then just cut through that last joint where the drumette meets the body.
28. To separate the thigh and the leg, find the point where they meet and cut right through that joint — it's mostly cartilage (which is pretty soft) and will be easy to cut through. You still might need to use some extra pressure here to make sure you get all the way through.


Then go ahead and slice the thigh. If it gets kinda messy, it's totally acceptable to shred the meat.
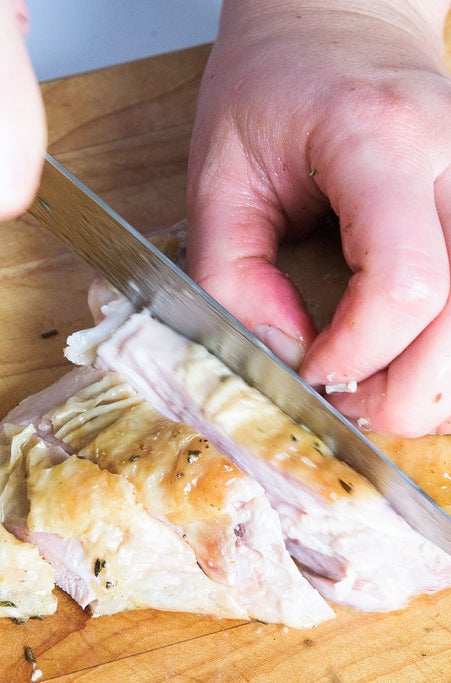
29. Then slice the breast against the grain into 1/2-inch thick slices.
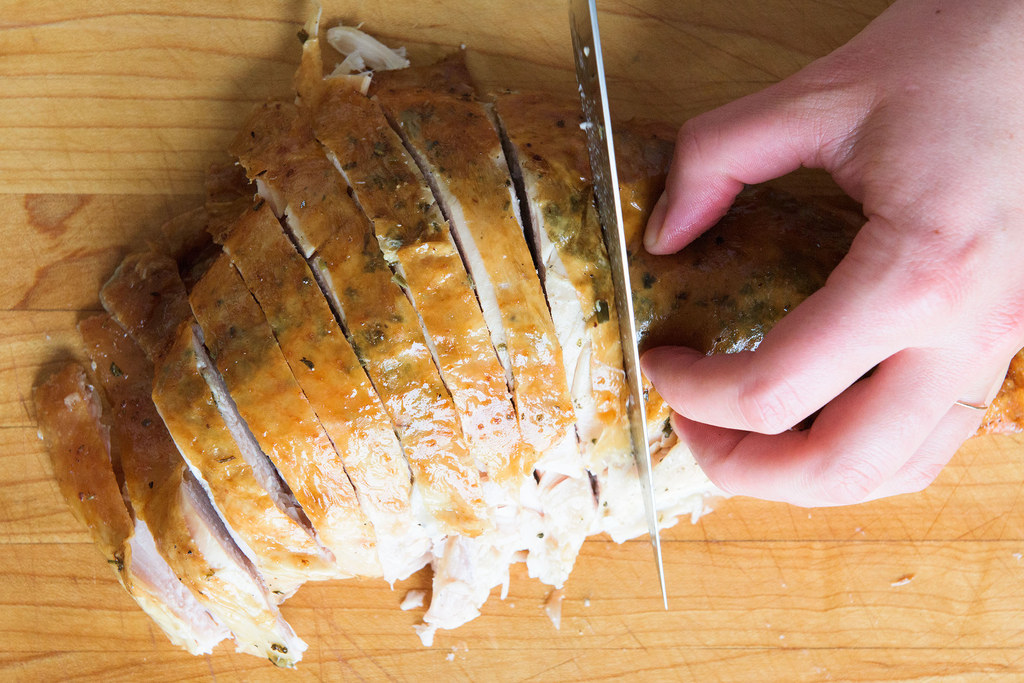
30. To transfer the breast to a serving plate (or whatever you're serving on), use the knife to lift up all the slices — this way they all stay together and look *Instagram ready*.


ONE MILLION LIKES.
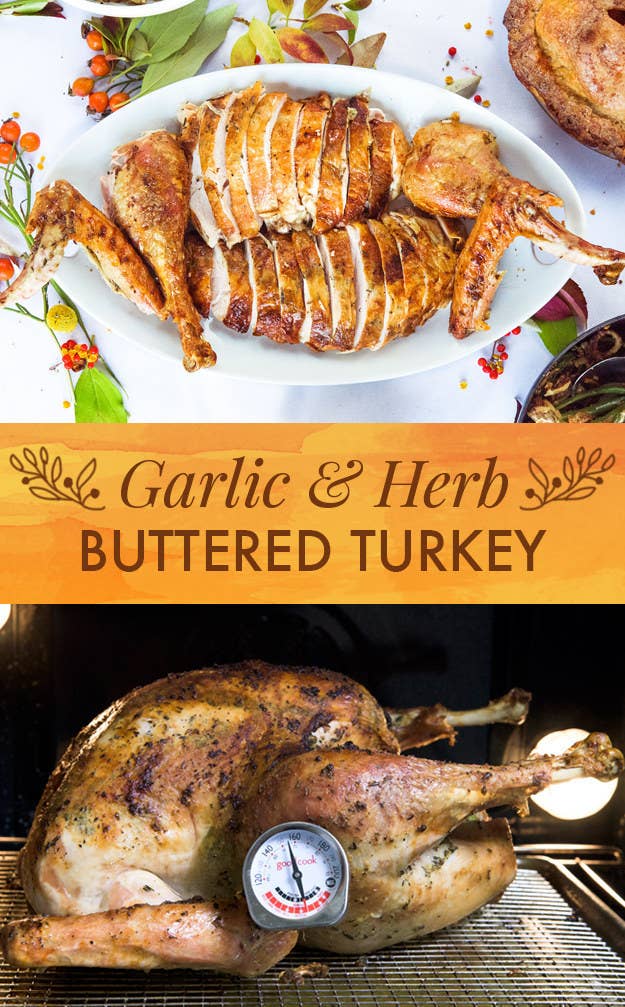
Herb and Garlic Buttered Turkey
Recipe by Alison Roman
Serves 8 with plenty of leftovers
¼ cup kosher salt
8 Tbsp. (1 stick) unsalted butter, softened, divided
8 cloves garlic, finely chopped
¼ cup finely chopped rosemary, plus some sprigs
2 Tbsp. finely chopped sage, plus some sprigs
2 tsp. ground black pepper
1 (12–15) lb turkey
2 onions, quartered
2 stalks celery, chopped
Preheat the oven to 425°F.
Combine the salt and 4 Tbsp. of the butter with the garlic, chopped rosemary, chopped sage, and black pepper in a medium bowl. Using a fork, mash this all together until you've got a paste-like situation. Yes, this mixture will be salty, but that is a lot of meat, so relax.
All turkeys are a little different in how they are packaged, but most will come with a plastic thingy and a baggie of giblets inside the cavity. Remove both of those things over the sink before starting.
Put the turkey on a wire rack set inside a rimmed baking sheet. Using paper towels, pat the turkey dry.
Rub some of the herb butter under the skin of the breast. Not as insane as it sounds: Just poke your fingers under the skin and slide your hand under it to loosen and pull the skin away from the breast meat. (Turkey skin is VERY stretchy and will not tear.) Put some butter on your hands and just….uh…slide it up in there. The turkey doesn't mind, we promise.
Now rub the turkey all over with the herb butter mixture. Don't worry about it being completely even — as the turkey roasts the butter will melt and distribute the flavor.
Tuck the wing tips under the breast so they don't burn. Put the turkey in the oven and pour about 4 cups of water in the bottom of the baking sheet. Roast the bird until the skin is starting to get brown, about 1 ½–2 hours. Every 45 minutes, rub the turkey with the remaining 4 Tbsp. butter.
Reduce the oven temperature to 375°F and continue to roast until a thermometer inserted into the fattest part of the thigh registers 155°F, another 60–90 minutes. (While it roasts, you might have to add another cup or so of water to prevent the drippings on the bottom of the pan from burning).
Remove the turkey from the oven and let it rest at least 30 minutes.
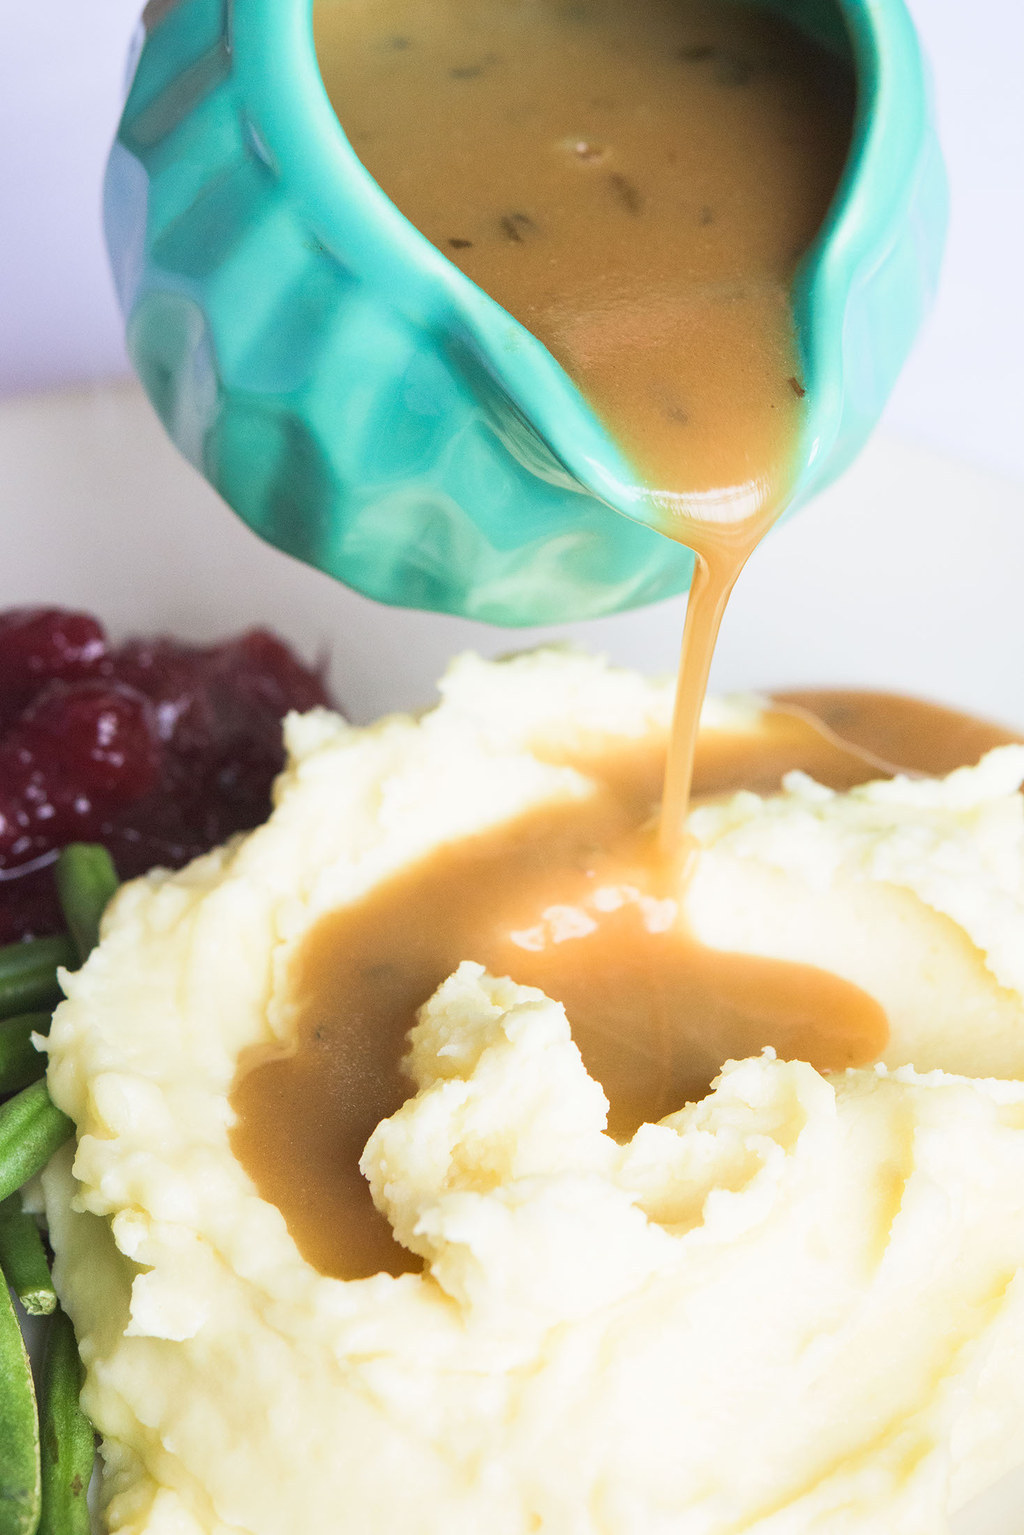
Need gravy? Of course you do. Head here for life changing gravy recipe.